I’ll document the changes we make in the condo here so you can see all we do to the place. Mostly the bones of the condo are pretty good. We love the vaulted ceilings and the wide staircase leading up to it. But some things over time need a bit of TLC and some things were amaturely completed and it showed. (IMHO) Since Gene and I have a fair amount of DIY skill (former rental property owners here), we’re tackling many of these projects ourselves.
To begin, we did hire a painter. The entire condo was color drenched with a light tan. I didn’t think it showcased what the condo could be and I didn’t care for the color. But since we needed to change out the flooring before moving in, we hired painters to come in and paint. Usually, I love to paint, but this was too much in a short amount of time.
Paint colors – Sherwin Williams Avenue Tan for the two bedrooms
Sherwin Williams Meadowlark for the living room, kitchen, hall and stairwell. This brown makes the other colors vibrant and I prefer adding color in the decorations in the room. Those are easier to change out when you need a new pop of color. The ceiling color was matched to the trim and doors. It’s a creamy white, but it was existing and I don’t have the name of it. I took a piece of trim to Sherwin Williams and they matched it up for me.
Total Cost:
Painter $1,400 (He painted the entire place – 3 coats including primer.)
Paint – $600
Total – $2,000
Flooring
We removed the old flooring which was a mixture of laminate (first generation, not made to get wet, showing signs of wear in the kitchen and bathrooms) and carpet. We removed it all and went with a luxury plank vinyl that can get wet (100% life proof). It’s easy to work with. We did this ourselves so we don’t have labor costs. Our two youngest sons helped us with it. We finished it in 2.5 days. Some people don’t remove the base molding when they floor with this flooring, we did. I don’t like using quarter round to cover gaps. I think it looks more professional than not removing the base molding. Plus the molding is easy to remove.


| The condo is an open floor plan with a view from the top of the steps through the kitchen, dining area and living room. Previously, it was split up between the old flooring and carpeting, making the rooms appear smaller. | By re-flooring in all the same color/pattern, we’ve made the rooms appear larger. We love the way it turned out. In future pictures you’ll see more of the flooring. |
Total Cost:
Flooring – $4,900
Flooring purchased at Menards in Green Bay. Product: Tarkett VeriCore Milled Hickory. We do a lot of our shopping at Menards because they offer 11% rebates on the entire store, so we’ll receive a rebate of over $400 (plus, because other items were purchased at the same time. For this flooring, we had $1,200 saved in rebates to put toward the flooring. So our out of pocket cost was $3,700) Make sure to check with your local home improvement stores for discounts and rebates.
Flooring Rebate -$450
Total – $3,250
Zen Den
We had a screened in patio at our other house and we fell in love with it. We ate most meals out there and sat out there in the evenings. The condo has a much smaller version of this patio, that we have lovingly named the Zen Den (thanks to my daughter-in-law, Shaina.) Below are the before and after photos of our new Zen Den.


| There wasn’t much on this patio except bird poop and remnants of bird’s nests. | Our patio set fit perfectly out here. We had this rug, which also fit perfectly. The picture and the candle holders we also had, as well as the flowers. All I needed to add were the candles, because the old ones didn’t make the move well. These are battery operated candles and they turn on each evening for 5 hours. Cost – $5.50 each candle, $11.00 |
Fireplace
We like our television on top of the fireplace. We watch television in recliners and if we also want a fire, we like being able to see both. The fireplace as it was needed some improvement. The stacked stone is an inexpensive product and as I began working with it to fill in below to the floor, it crumbled easily. It seems to be made of some sort of gypsum or chalk. But it was here, so we thought we’d just paint it.


| The first picture shows the fireplace (and flooring when we first looked at the condo) (Scroll over using the little arrows in the photo). I thought it looked weird. The stone on the top row, didn’t seem to fit with the rest of the stone with the gap in between. They didn’t bring the stone all the way to the floor either. There was a 2″ gap between the bottom row and the floor. | In this picture, I’ve taken the stone removed from the top and fitted in at the bottom so the stone drops to the floor. I then painted it black. Gene added a rough hewn mantle and a shelf for the sound bar. He drilled a hole in the top of the mantle to run the cords for the sound bar so you can’t see them. Total cost: Mantle boards – $24 Paint (which will be used for other projects also – $32 Board for shelf – $6 Brackets to hang shelf – $3 Total – $65 Time: 4 hours |
Wall Niche
We have this wall niche between the kitchen and living room. I’ve always liked these, they are a great way to showcase something or add interest to the area. This one was plain as can be. We had purchased a mantle on the Marketplace a couple of months ago, thinking it would work great for the fireplace. After getting in the condo, the mantle was too short, but it fit nicely in the wall niche. Bonus. Gene had to do a bit of cutting though to make it fit properly, but he did a great job with it.


| The niche was plain and uninteresting before. | With the mantle added, it adds interest. It’s not completely finished though. As soon as we change our countertops (stay tuned), I’ll be adding a tile backsplash in the kitchen and my plan is to use the same tile in the niche to bring the two areas together. I caulked around the entire mantle to add the finished look to it. Total Cost: Mantle – $60 I already had the caulk from the flooring project. |
Breakfast Bar
The breakfast bar was too tall. When sitting on a regular bar stool, it felt like your elbows were pointed up to the ceiling and you were four years old. It had the same stone on it as the fireplace. The stone, as I said above, it a gypsum product and not that great. But it was here. My thought was to paint it to match the fireplace since the condo is open concept. But, when I began painting it, the blocks began to fall out. They were not fastened appropriately and we were able to easily pull them off. In less than 45 minutes, the stone was removed. Then we needed to decide what to do. Enter rough hewn wood!


| We removed the stone, as I mentioned, it came off easily. | Once we took the countertop off the breakfast bar we found they’d built it up, so we removed that to bring it down to an easier height. We used the same wood we used for the mantle on the fireplace. Then we mimicked the foot rail that’s on our kitchen table. 12 boards – $174 Counter supports (4) – $36 Black pipe for the footrail – $78 Total cost – $288 |


Window Sills
Our condo has what the building industry calls, “Drywall Return” sills. That means there’s no woodwork or trim around the windows. This can be construed as a “clean” look. I think it’s boring. That might just be me, but my first thought was the builder just tried to save money (usually the case). We’re using the rustic finish on any wood we add here in the condo, so I needed to stain the wood to make it look weathered. I used two colors of stain. One lighter and one darker. I stained the boards with the lightest stain and let them dry. I went back in with the darker stain, and added it around the knots and followed the grain pattern in places, then using a rag, rubbed it in to soften the lines and distribute it where I wanted it. These pictures don’t do it justice because they turned out fantastic. I then sealed all the wood, even the fireplace mantle and the back of the breakfast bar, with a matte clear coat, so it would be easier to clean. We’re so happy with how it turned out. And the costs were so low. Our living room window is the largest window at nearly 8 feet. But the office and bedroom windows are only 5 1/2 feet and the bathroom window is small at around 2 feet.
All together, the wood only costed $45 – the stain costed $55 for a grand total of $100 for all of the windows. Most of the time spent was waiting for the stain to dry. Screwing the boards together didn’t take long and attaching them to the windows was nominal. We had this project completed in less than a day.


Stairwell
We’re in an upper, which if you’d told me years ago that we’d enjoy that, I would have had a great laugh. But, it turns out, we LOVE it. It’s safer, we have an excellent view and it’s quiet here. We have fantastic neighbors and we’re in a great neighborhood. So, we’re in an upper! Which means we have this staircase immediately upon entering. But it was plain and I started looking on Pinterest for interesting stairwell designs. I blended a few of them together, along with the pictures we had here to hang up. The only things I purchased for this were the “Family” and the little flowerettes. Everything else we had.


This week we focused on the Garage. We spent a bit of money on this update though. We had the garage floor finished with a polyurethane product by NEW Garage Floors. We think it looks great. We had the cabinets and I painted them flat black. We painted the hardware with Hammered Copper Krylon paint. And I painted the baseboards the same black as the cabinets.
Flooring – $2,600
Paint – I had this from the fireplace
Baseboards – $72
Krylon Hammered Copper Paint – $10.00
Total – $2,682


Countertop and Faucet
We added a granite countertop in our second bathroom. I’ve found a lot of great bargains on the Marketplace and this was one of them. We bought this countertop and sink for $100. It was still in the box. It’s the perfect fit and I love the colors. We added the black faucet to match the one we put in our bathroom and the mirror. In all, it wasn’t an expensive update.
Granite countertop and sink – $100
Faucet – $69 (on sale at Menards)


Office
I’ll sound like a broken record about the Marketplace, but…
I initially had a daybed in the office for the grandkids to sleep on when they stay over. It was far too big in this space and made the room look crowded and smaller than it is. (Though in the picture below, it doesn’t seem like it unless you look at the position of the photos above each piece.) I found this pullout sofa on the Marketplace for $175. I sold the daybed for $350. That’s not all profit. I purchased a new trundle mattress when I bought the daybed and it’s never been used. Plus two sets of sheets and two comforters. It’s more than likely a break-even. But the sofa is a much better size in this room and the grandkids love it.


Bathroom
Last week we installed a shower door in our bathroom. (This is the primary bathroom in our bedroom.) We’ve had the door since the week we moved in, but since I had a shower curtain we could use, it stood behind our bathroom door until this past week. We still have a bit of trim work to do – as you can see, the door is taller than the shower. Since we’ve chosen the rustic look for this place, we’ll be adding the wooden boards we have on the breakfast bar above the shower and trimming it out. I’m excited to see how it looks. But for now, we have a door and I love it. The bathroom looks bigger and when taking a shower, it’s brighter in there. We have a small shower and a sliding door wouldn’t work, so finding a pull-open door was the biggest challenge here. None of the DIY stores here had them. So off to Amazon I went. I found the size I needed and ordered it. The first door came in packaging that was damaged, the broken pieces of the door poking through the box and laying on it’s side, despite the large print on the box and the giant arrow pointing toward the top saying – Stand Up Only. So, I had to return it and order another one. This one is the one we finally installed. I love the clean lines and once the final pieces are put in place, and the wood in on the walls above, it’ll look so much nicer. I’ll update the pictures here.
Shower Door Cost – $462
1 tube of clear caulk – $6.50
Total – $468.50


Bathroom Light
In keeping with our theme, and my Marketplace shopping, we also installed a new light fixture in the bathroom. I wanted the fixture to be sleek and the glass globes clear. I also found Edison bulbs with spiral filaments and I just had to have those. I found the fixture on the Marketplace for $30. The spiral Edison bulbs I found at Home Depot and also on Amazon. They are abut $2.00 per bulb.
Light Fixture – $30
Bulbs – $8.00
Total – $38.00


Bar Stools
This isn’t necessarily the condo update, but it is a furniture update of sorts. We have a small space here, and I do love living here. But, the eating area is very small. Our table is small and the bar stools we put along the breakfast bar took up a lot of space. I have been searching the marketplace for months for smaller scale but sturdy stools for that space but couldn’t find what I wanted without paying a fortune. I stared at our existing stools and thought I might be able to take the backs off of them. We tried. We took out nearly every screw, but these stools are made well. They are glued and screwed all over the place. So I asked Gene to cut the backs off. We took them to the garage and he used a circular saw to saw the backs off. We left a short back on, and I painted that portion black. I’m now looking for metal details to add to the top of them, but I love, love, love the space we have gained. Plus the look isn’t so “busy” and it allows us to see the back of the bar and the pretty wood we added there.
Cost – $0.00 (I had the paint)


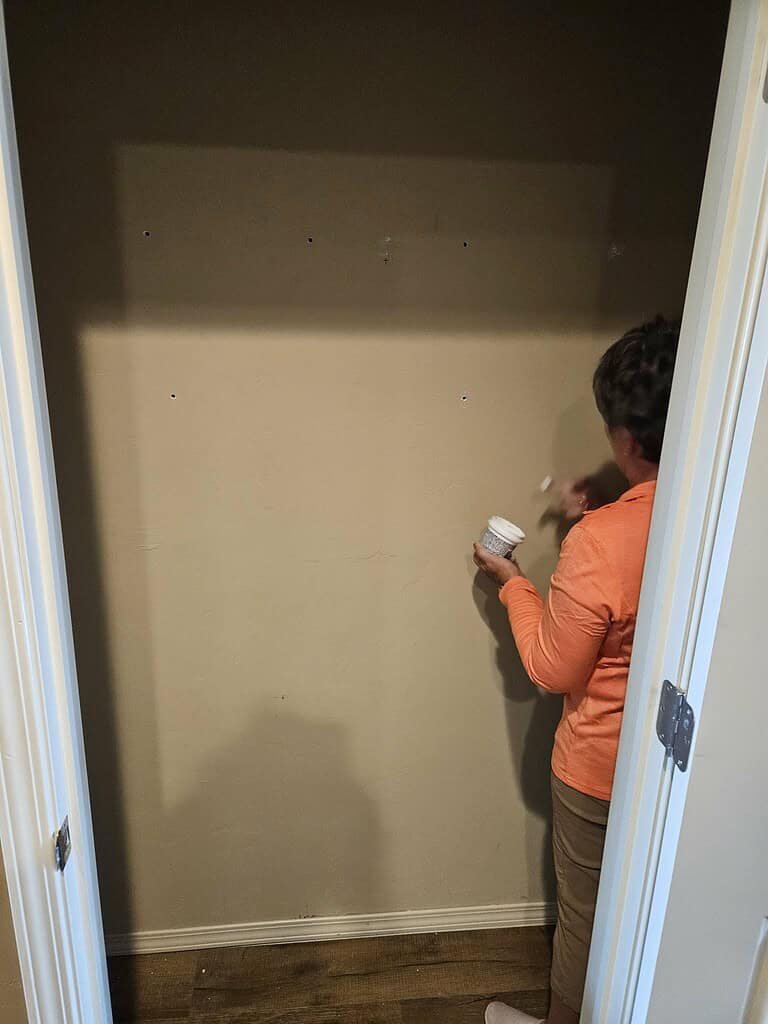
Pantry Closet
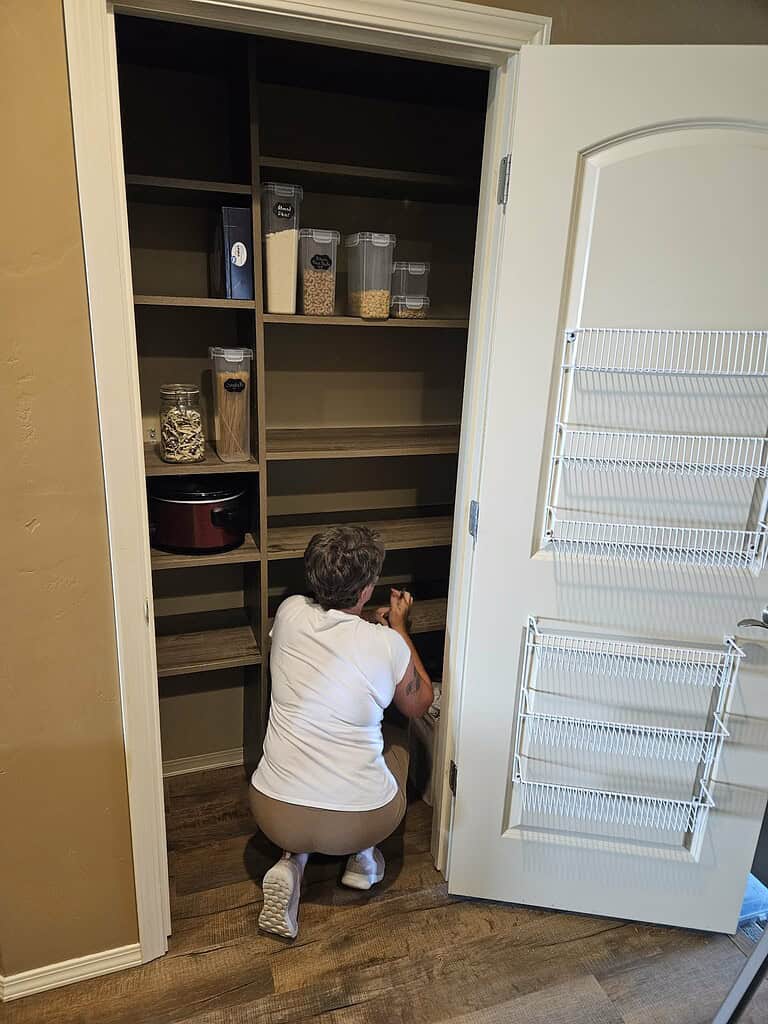
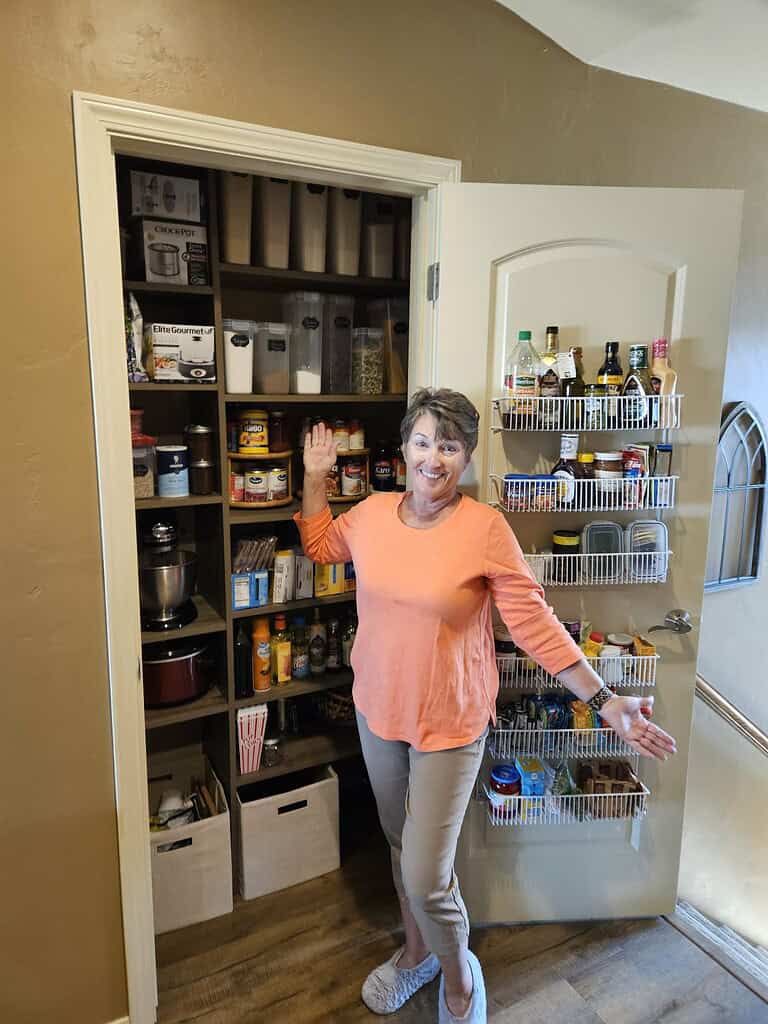
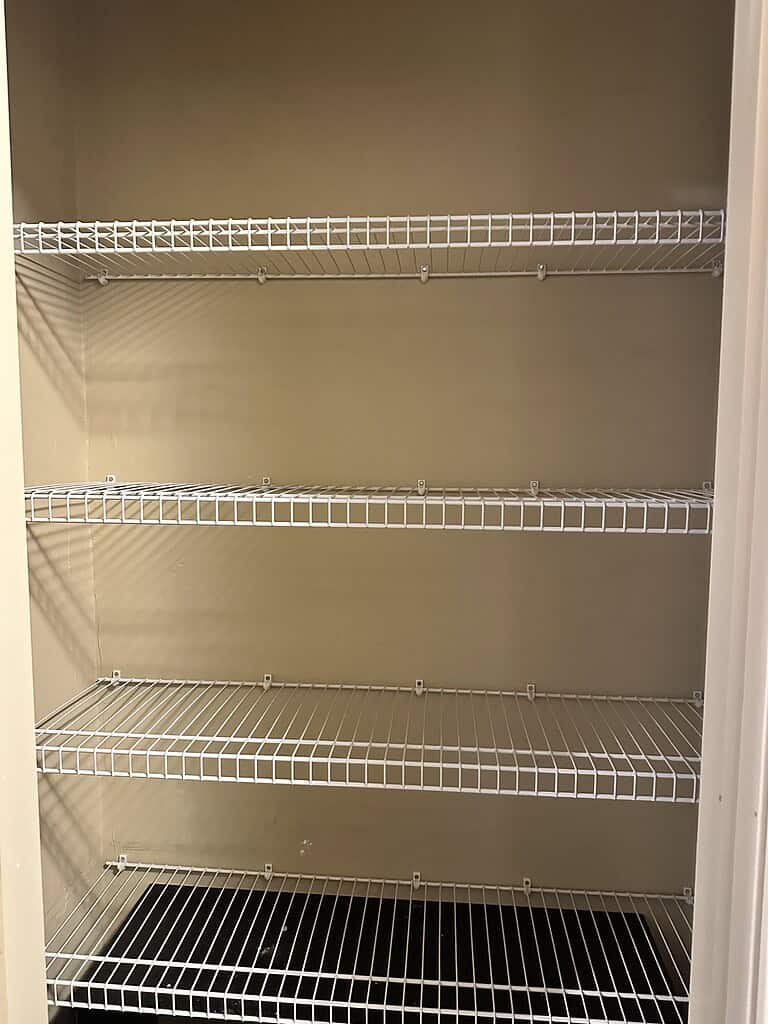
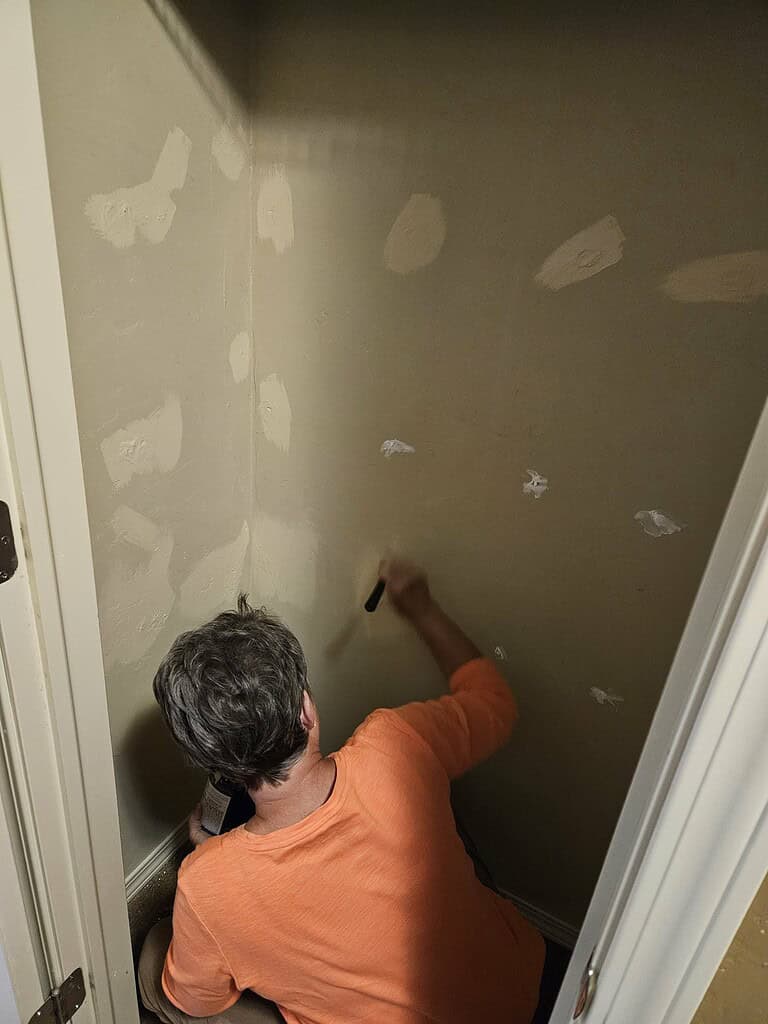
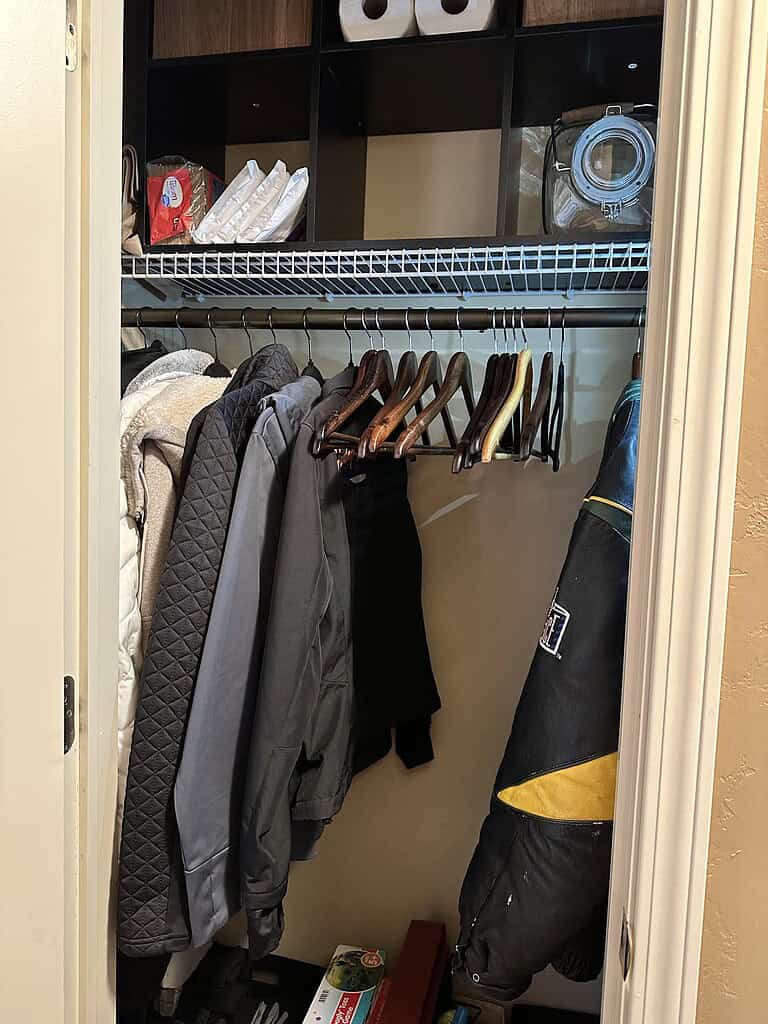
We came home from Florida on Saturday evening after driving 18.5 hours. We brought all the food from our pantry there because it will sit for 5 months and we didn’t want it to get old. That means, our pantry here needed a bit more shelving. We’d discussed it before we left so it was a project slated to happen sooner rather than later. We have 2 closets in the condo – 1 at the top of the stairs coming it, which is the coat closet. The other just a few steps away in the hallway, which is the pantry. The issue – When we’re cooking, the coat closet is closer to the kitchen than the pantry. The other issue is the coat closet is larger (not by a lot, but it is bigger) than the pantry. So we switched them. It was more work than I figured it would be, mostly because we had to move shelves a couple of times to fit everything in it’s place. Figuring out where everything will fit best is the hard part. We may still have a couple of things to move here and there, but dang it looks awesome! The first picture is me filling the holes where the wire shelf had been installed. There was only one shelf in this closet and a lot of wasted space. The second picture is as the shelves were going in. I kept measuring to see where the shelves should be. The last one is the finished picture. The racks on the door are excellent for smaller things that get lost. The last three photos are the old pantry. There were four wire shelves inside. We removed the bottom three shelves and I patched the holes and painted (pro-tip, always keep a bit of paint, you never know when you’ll have to patch something up). The last picture is the finished coat closet. I had a cube storage unit on the floor, we raised it up and put it on the top shelf, then added a metal clothing bar. It took more time for the paint to dry than actually finish the closet. But I have extra storage now, and we have a smaller, but perfectly fine coat closet with room for guests clothes when they come over.
We used the Dakota Closets product again, mainly because I like it. It’s easy to work with and customizable. Cost – $350